
Air Fryer Garlic Bread
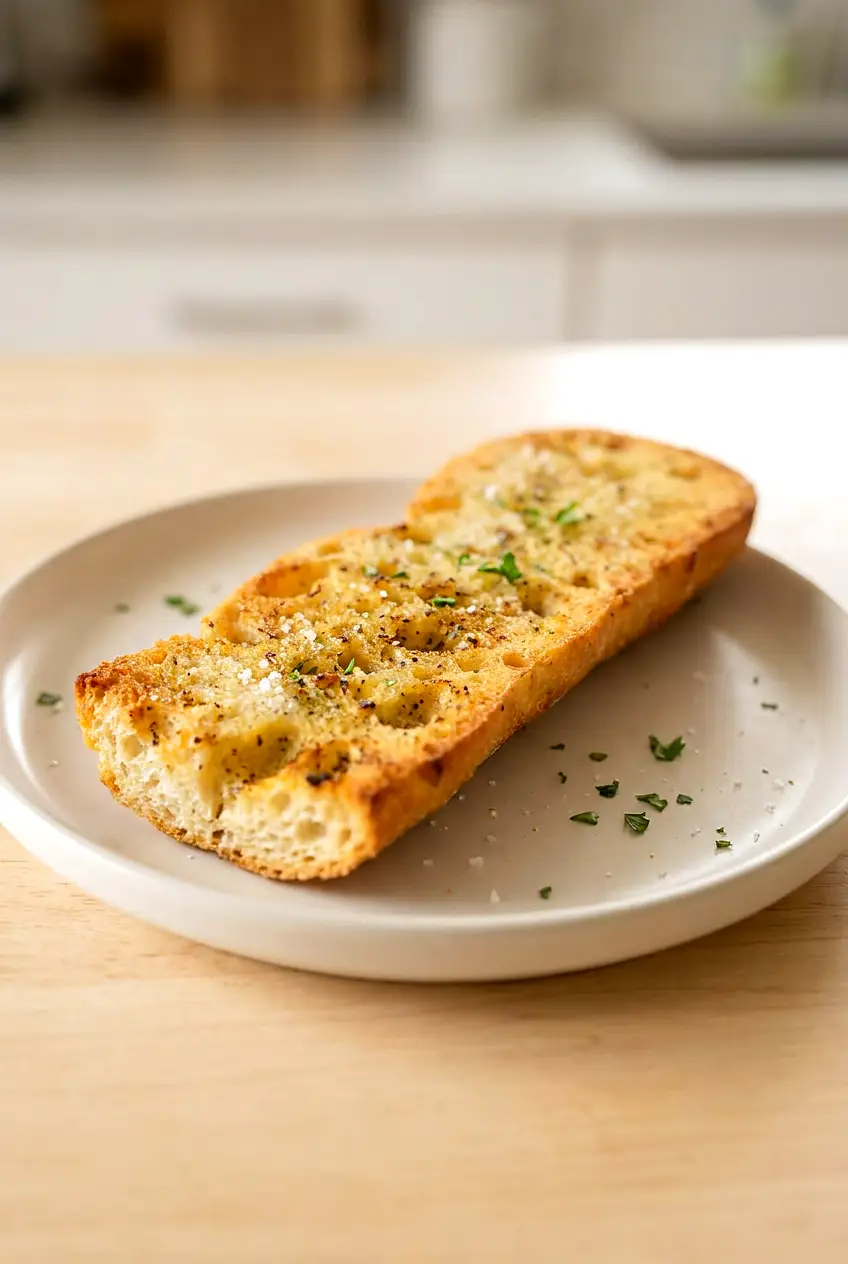
I rely on the visual cue more than the clock for air fryer garlic bread. Bread can go from lightly toasted to too dark fast, especially in hotter units, so I usually look for a golden top, crisp edges, and butter that has melted into the bread without pooling.
This version keeps it simple with a store-bought baguette, soft non-dairy butter, and onion salt for the base seasoning. It cooks quickly, works well with soup, salad, or pasta, and gives you crisp edges with a softer center.
Ingredients for Air Fryer Garlic Bread
- 1 baguette, about 12 to 16 ounces (340g)
- 1/4 cup soft non-dairy butter (about 55g)
- 1 to 1 1/2 teaspoons onion salt
- 1/2 teaspoon granulated garlic, if your seasoning blend does not already include garlic
- Pinch of fine salt, optional, to taste
- Small pinch of black pepper, optional
Optional for finishing:
- 1 to 2 tablespoons chopped fresh parsley
- 2 to 4 tablespoons grated Parmesan or vegan Parmesan
- 1/2 teaspoon Italian seasoning
A store-bought baguette is the easiest choice here, but another crusty loaf can work if it fits your air fryer. I find tub-style non-dairy butter easiest to spread evenly, which matters because thick blobs of butter can melt off before the bread toasts.
Butter and Seasoning Notes
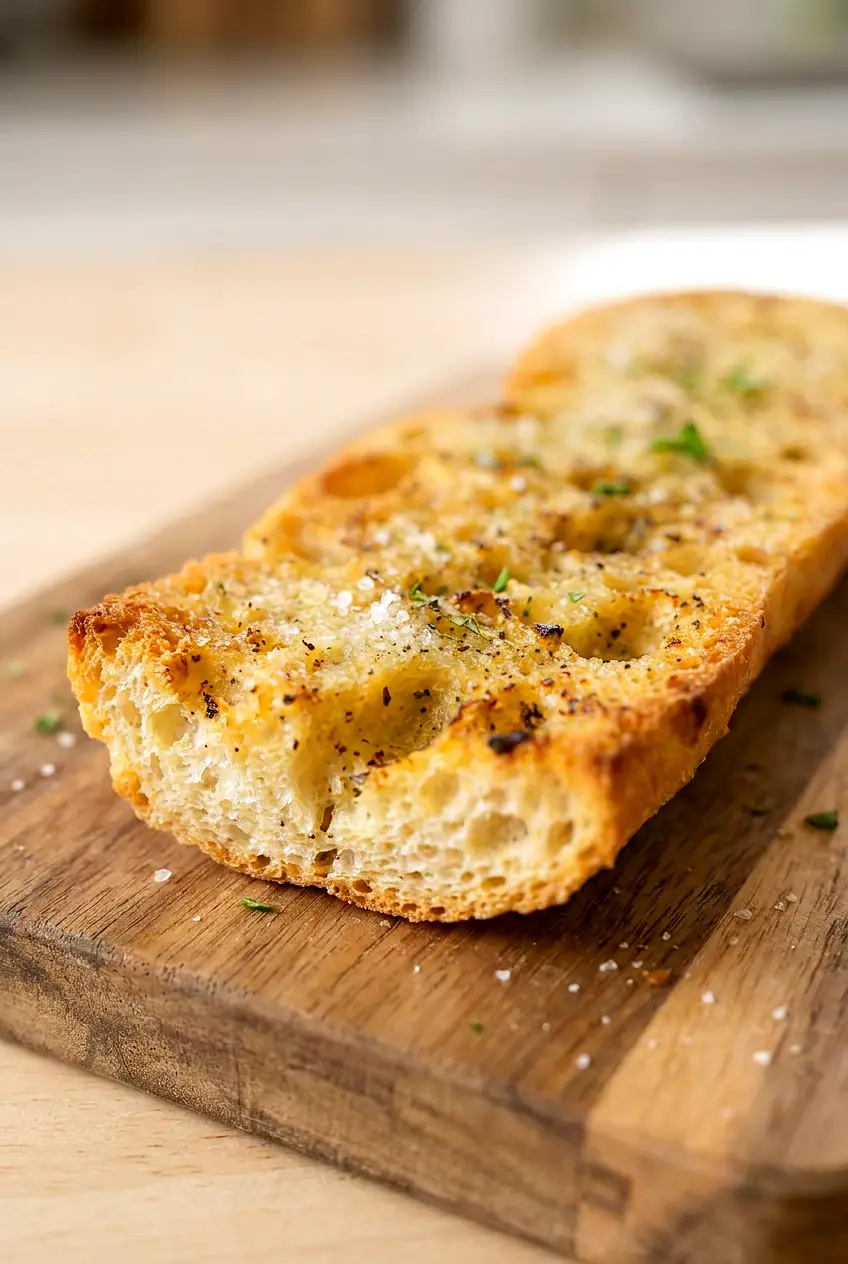
I’d rather keep the seasoning simple here because the bread already browns quickly in the air fryer and does not need much to taste balanced. Onion salt gives the bread a savory base, and if your blend does not include garlic, the granulated garlic helps it actually taste like garlic bread instead of just buttered toast.
If you are using a salted butter substitute, start with the lower amount of onion salt. If your butter is unsalted or mild, you may want the full amount for better flavor.
How to Make Garlic Bread in the Air Fryer

- Cut the bread: Slice the baguette into halves or shorter sections that fit your basket or tray. Split each piece lengthwise so the cut sides are flat and toast evenly.
- Mix the butter spread: In a small bowl, stir the soft non-dairy butter with the onion salt and granulated garlic, if using. Add a tiny pinch of salt or black pepper only if needed. The mixture should be smooth and easy to spread.
- Spread evenly: Spread the seasoned butter over the cut side of each piece of bread, all the way to the edges. Keep the layer even rather than thick so it melts into the bread instead of dripping into the basket.
- Preheat if needed: Preheat the air fryer to 390°F to 400°F (200°C to 205°C) if your model benefits from preheating. A hot basket helps the bread start to toast right away.
- Air fry cut-side up: Arrange the bread in a single layer with the cut sides facing up. Air fry at 390°F to 400°F (200°C to 205°C) for 5 to 6 minutes, checking around 4 to 5 minutes. You usually do not need to flip it. If your air fryer browns unevenly, rotate the pieces or switch rack position near the end.
- Check for doneness: The garlic bread is ready when the top is golden, the edges are lightly crisp, and the butter looks absorbed rather than pooled on the surface. Thin pieces can brown faster, so pull those first.
- Rest and serve: Let the bread sit for 1 minute so the butter sets slightly, then slice and serve warm. Add parsley, Parmesan, vegan Parmesan, or Italian seasoning if you want a little extra finish.
Air Fryer Time and Temperature for Garlic Bread
A good starting point is 390°F to 400°F (200°C to 205°C) for 5 to 6 minutes. Start checking early rather than waiting for one exact minute mark, since air fryer models vary quite a bit with bread.
Basket-style air fryers often brown the top quickly, while oven-style models may need a little more time or a rack adjustment near the end. No oil is needed if the butter is spread evenly.
How to Keep Air Fryer Garlic Bread from Getting Too Dark
This is where the texture can go wrong. If the bread is crowded, the centers warm more slowly while the edges race ahead. If the butter layer is too thick, it can puddle and leave the top greasy instead of evenly toasted.
- Cook in a single layer and work in batches if needed.
- Spread the butter evenly, not heavily.
- Start checking at 4 to 5 minutes, especially with thinner baguette halves.
- Pull the bread when it is golden, not deeply browned.
What to Serve with Air Fryer Garlic Bread
This fits best next to simple weeknight meals. Serve it with tomato soup, minestrone, or another brothy soup, alongside a green salad or Caesar-style salad, or with pasta, marinara, and other saucy Italian-style dinners.
How to Store and Reheat Air Fryer Garlic Bread
Store leftover garlic bread wrapped well or in an airtight container at room temperature for short-term storage, or refrigerate it if you need to keep it a bit longer. It will soften as it sits, so expect less crispness than when fresh.
To reheat, return it to the air fryer at a lower temperature just until warmed and re-crisped, watching closely so it does not dry out or over-brown. A short air fryer reheat works much better than microwaving.
If you want to prep ahead, you can mix the butter spread in advance and refrigerate it. Let it soften slightly before spreading so it goes on evenly.
Nutrition
Approximate nutrition, based on 6 servings and the main ingredients only.
- Serving size: 1/6 of recipe
- Calories: about 180
- Protein: about 5g
- Fat: about 8g
- Carbohydrates: about 23g
Approximate nutrition per 100g:
- Calories: about 290
- Protein: about 7g
- Fat: about 12g
- Carbohydrates: about 37g
Nutrition is an estimate and will vary with the size of the baguette, the butter substitute, and the seasoning blend you use.
Air Fryer Garlic Bread
Equipment
- air fryer
- small bowl
- knife
- butter knife
- measuring spoons
Ingredients
Main
- 1 baguette, about 12 to 16 ounces (340g)
- 1/4 cup soft non-dairy butter (about 55g)
- 1 to 1 1/2 teaspoons onion salt
- 1/2 teaspoon granulated garlic (use if seasoning doesn’t include garlic)
- Pinch of fine salt (optional)
- Small pinch of black pepper (optional)
Optional finishing
- 1 to 2 tablespoons chopped fresh parsley
- 2 to 4 tablespoons grated Parmesan or vegan Parmesan
- 1/2 teaspoon Italian seasoning
Instructions
- Slice the baguette into halves or shorter sections that fit your air fryer and split each piece lengthwise so the cut sides are flat.
- In a small bowl, stir the soft non-dairy butter with the onion salt and granulated garlic; add a tiny pinch of salt or black pepper only if needed.
- Spread the seasoned butter evenly over the cut side of each piece of bread, all the way to the edges in a thin, even layer.
- Preheat the air fryer to 390°F to 400°F (200°C to 205°C) if your model benefits from preheating.
- Arrange the bread in a single layer in the air fryer with the cut sides facing up.
- Air fry at 390°F to 400°F (200°C to 205°C) for 5 to 6 minutes, checking around 4 to 5 minutes; rotate pieces or switch rack position if browning is uneven.
- Pull the bread when the top is golden, the edges are lightly crisp, and the butter looks absorbed rather than pooled.
- Let the bread rest for 1 minute so the butter sets slightly, then slice and serve warm; add parsley, Parmesan, or Italian seasoning if desired.
Tips
- Cook in a single layer and work in batches if needed to ensure even browning.
- Spread the butter in a thin, even layer so it melts into the bread instead of pooling.
- Start checking for doneness at 4 to 5 minutes, especially for thinner pieces.
- Pull the bread when it is golden, not deeply browned, to avoid overcooking.
- Rotate or move pieces near the end if your air fryer browns unevenly.
Variations
- Parmesan Garlic Bread: Sprinkle 2 to 4 tablespoons grated Parmesan (or vegan Parmesan) over the bread after air frying for a cheesy finish.
- Herb Garlic Bread: Finish with 1/2 teaspoon Italian seasoning and 1 to 2 tablespoons chopped fresh parsley for an herby note.
- Vegan Garlic Bread: Use a vegan grated Parmesan and non-dairy butter as written for a fully plant-based version.
Recipe Reviews & Comments (1)