
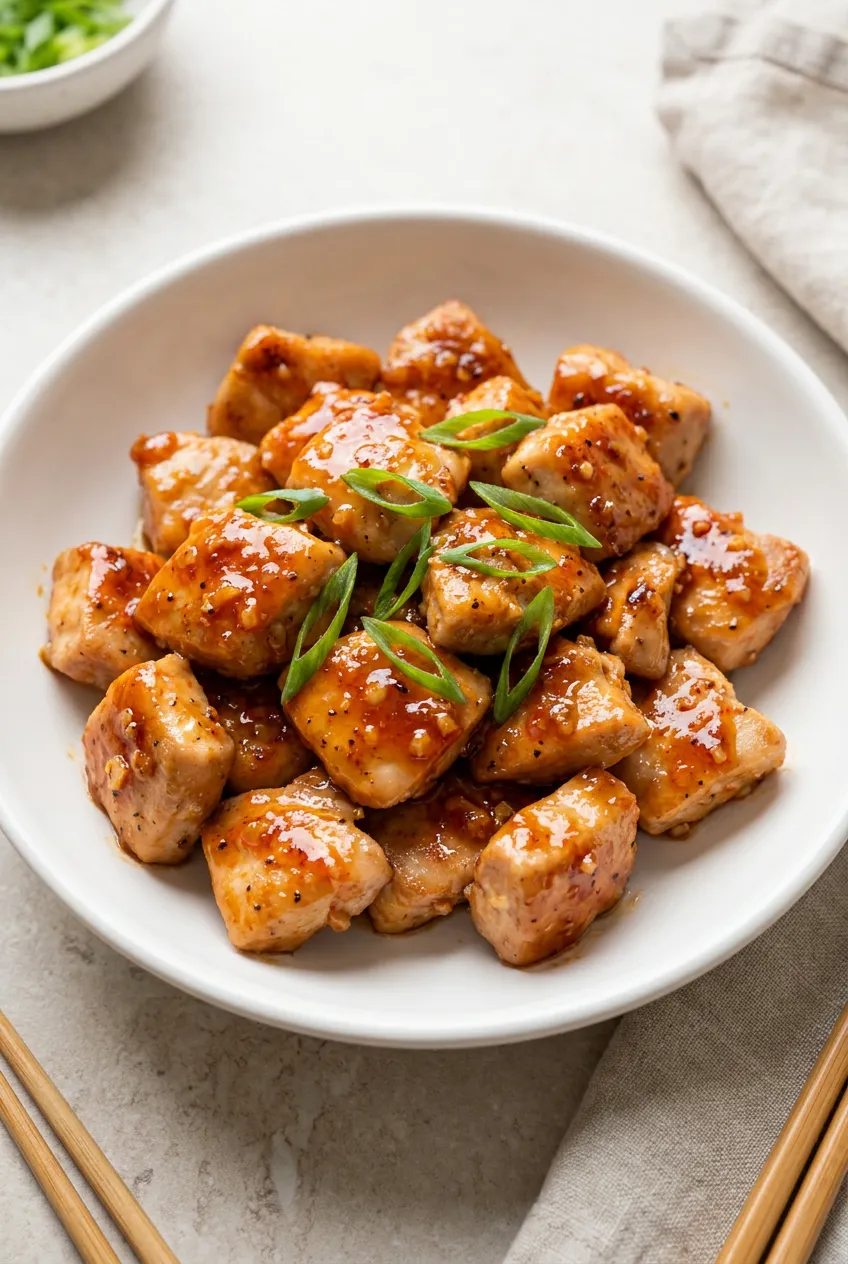
Air Fryer Honey Garlic Chicken
Honey-based sauces can scorch fast in the air fryer, especially when they drip into a hot basket. For this Air Fryer Honey Garlic Chicken, the chicken cooks first in bite-size pieces, then gets tossed with a glossy honey-garlic glaze after cooking.
That small timing change keeps the chicken browned and tender without burning the sauce. Use boneless, skinless chicken thighs for the juiciest result, or chicken breasts if you want a leaner, faster-cooking option. This recipe serves 4 and takes about 20 to 25 minutes.
Ingredients for Air Fryer Honey Garlic Chicken
- 1 1/2 lb boneless, skinless chicken thighs or breasts, cut into 1-inch pieces (680g) — thighs stay juicier; breasts cook a little leaner and can dry out faster.
- 1 teaspoon kosher salt — use a little less if your soy sauce is not low-sodium.
- 1/2 teaspoon black pepper
- 1 tablespoon cornstarch (8g) — gives the chicken a light coating and helps the sauce cling.
- 1 tablespoon neutral oil, such as avocado or canola oil — helps browning and reduces sticking.
- 1/3 cup honey (113g)
- 3 tablespoons low-sodium soy sauce
- 1 tablespoon fresh minced garlic, about 3 to 4 cloves (10g)
- 1 tablespoon rice vinegar or apple cider vinegar
- 2 to 3 tablespoons water, for thinning the glaze
- 2 teaspoons cornstarch (5g), for the slurry
- 2 teaspoons water, for the slurry
Optional but useful: add 1/4 to 1/2 teaspoon red pepper flakes to the glaze for gentle heat, stir in 1/2 teaspoon toasted sesame oil off heat, or finish with sesame seeds and sliced green onions.
Chicken Thighs vs Chicken Breast in the Air Fryer
Boneless, skinless chicken thighs are more forgiving in the air fryer because they stay moist even if they cook a minute longer than planned. Chicken breasts also work, but start checking them around 8 minutes because they dry out faster.
Whichever cut you use, keep the pieces close to 1 inch. Small pieces can overcook before larger ones reach 165°F (74°C), and uneven pieces brown less consistently.
Why the Honey Garlic Sauce Goes on After Air Frying
Honey and other sugars caramelize quickly at air fryer temperatures. If the glaze goes on before the chicken is cooked through, it can scorch, smoke, or burn onto the basket before the chicken reaches a safe internal temperature.
Cooking the sauce separately gives you better control over the thickness and keeps the glaze smooth and glossy. The optional 1-minute air fryer finish is just to set the coating slightly, not to cook the sauce from scratch.
How to Make Air Fryer Honey Garlic Chicken
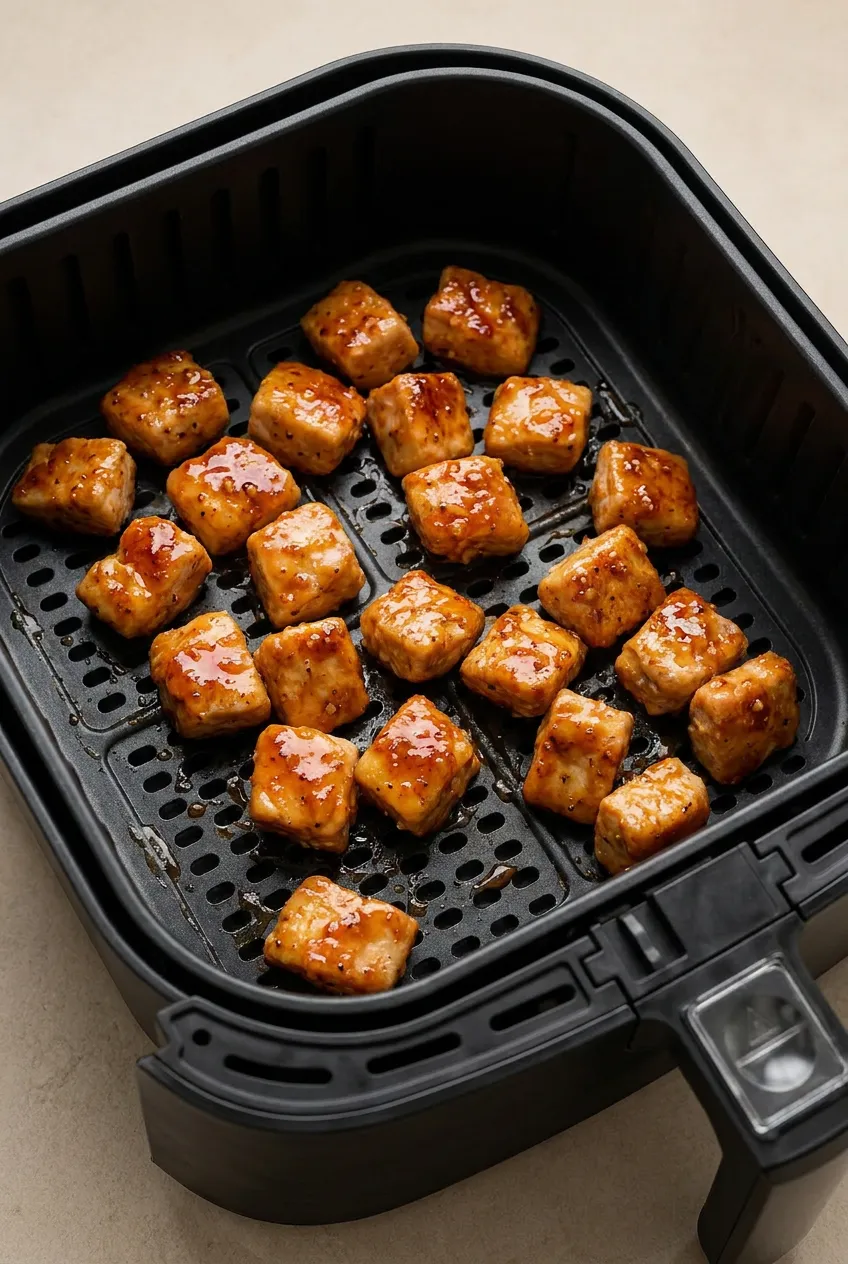
- Preheat the air fryer: Preheat to 380°F (193°C) for 3 to 5 minutes. Preheating helps the small chicken pieces brown quickly. If your model auto-preheats, use that setting.
- Season the chicken: Pat the chicken dry, then cut it into 1-inch pieces. In a mixing bowl, toss the chicken with kosher salt, black pepper, 1 tablespoon cornstarch, and oil until evenly coated. The coating should look light and even, with no dry clumps.
- Arrange in the basket: Lightly spray the air fryer basket if needed. Arrange the chicken in a single layer with small gaps between pieces. Cook in batches if needed; crowded chicken steams and stays pale.
- Air fry the chicken: Cook at 380°F (193°C) for about 8 to 11 minutes, flipping or shaking halfway through. Start checking around 8 minutes, especially with chicken breast or a smaller air fryer. The chicken is done when the thickest piece reaches 165°F (74°C) and the edges are lightly browned.
- Make the honey-garlic glaze: While the chicken cooks, combine honey, low-sodium soy sauce, garlic, vinegar, and 2 tablespoons water in a small saucepan. Bring to a simmer over medium heat. Whisk 2 teaspoons cornstarch with 2 teaspoons water, then stir the slurry into the glaze. Simmer briefly until glossy and thick enough to coat a spoon. Add another tablespoon of water if it gets too thick.
- Toss with the sauce: Transfer the hot chicken to a clean bowl. Pour the glaze over the chicken and toss until every piece is coated. Let it sit for 1 to 2 minutes so the sauce settles and clings.
- Optional tacky finish: For a slightly stickier coating, return the sauced chicken to the air fryer for about 1 minute at 380°F (193°C). Watch closely. Once honey is on the chicken, it can darken quickly.
Air Fryer Time and Temperature for Honey Garlic Chicken
Cook 1-inch chicken pieces at 380°F (193°C) for about 8 to 11 minutes, flipping or shaking halfway through. Air fryer models vary, so use the time as a range rather than a fixed rule.
The most reliable doneness check is an instant-read thermometer. Chicken is done when the thickest piece reaches 165°F (74°C). Visually, the pieces should look firm and opaque in the center with lightly browned edges.
How to Get Better Browning Without Drying Out the Chicken
Use a Single Layer
Small gaps between the chicken pieces let hot air move around the edges. If the basket is crowded, the chicken releases moisture and steams instead of browning. Cook in batches if needed and hold the first batch loosely covered while the second batch cooks.
Flip or Shake Halfway
Turning the chicken exposes more surface area to direct heat. For basket-style air fryers, shake or flip the pieces halfway through. For oven-style air fryers, rotate the trays if your model browns unevenly.
Check Early for Chicken Breast
If the chicken turns out dry, it was likely overcooked or cut unevenly. Start checking early with chicken breast, and use the internal temperature as the final check instead of relying only on time. Thighs are the better choice if you want a little more cushion.
Useful Swaps for Honey Garlic Chicken
Tamari can replace soy sauce if you need a gluten-free option. Coconut aminos also work, but they are usually a little sweeter, so you may want to slightly reduce the honey.
Arrowroot can replace cornstarch, but use a little less and avoid boiling the glaze hard after adding it. If you only have garlic powder, use 1/2 teaspoon in the glaze in place of the fresh garlic.
What to Serve with Air Fryer Honey Garlic Chicken
- Steamed rice with broccoli or green beans
- Lettuce wraps with cucumber and scallions
- Noodles or a quick veggie stir-fry
- Meal-prep bowls with rice or quinoa
- A squeeze of lime, sesame seeds, and sliced green onions
For a crunchy chicken option, try Air Fryer Panko Crusted Chicken Breasts. If you like sticky-sauced chicken, try our Air Fryer BBQ Chicken Breast next.
How to Store and Reheat Air Fryer Honey Garlic Chicken
Cool the chicken completely, then refrigerate it in an airtight container for up to 4 days. For longer storage, freeze portions for up to 2 months and thaw overnight in the refrigerator before reheating.
- Air fryer: Reheat at 350°F (177°C) for 3 to 5 minutes, stirring once. Add a teaspoon of water if the sauce looks too thick or dry.
- Microwave: Heat for 60 to 90 seconds, stirring halfway through.
- Skillet: Warm over medium-low heat with a splash of water until heated through.
For the glossiest make-ahead result, store the cooked chicken and glaze separately. Reheat the chicken, warm the glaze, then toss them together right before serving.
Nutrition
Approximate nutrition per serving, based on 4 servings and using boneless, skinless chicken thighs: 410 calories, 32g protein, 19g fat, and 28g carbohydrates.
Approximate nutrition per 100g: 215 calories, 17g protein, 10g fat, and 15g carbohydrates. Values will vary depending on whether you use chicken thighs or breasts, the brand of soy sauce, and how much glaze remains in the bowl.
Air Fryer Honey Garlic Chicken
Equipment
- air fryer
- mixing bowl
- small saucepan
- whisk
- tongs
- instant-read thermometer
Ingredients
For the Chicken
- 1 1/2 lb boneless, skinless chicken thighs or breasts, cut into 1-inch pieces (680g)
- 1 teaspoon kosher salt
- 1/2 teaspoon black pepper
- 1 tablespoon cornstarch (8g)
- 1 tablespoon neutral oil (avocado or canola)
For the Honey-Garlic Glaze
- 1/3 cup honey (113g)
- 3 tablespoons low-sodium soy sauce
- 1 tablespoon fresh minced garlic (about 3 to 4 cloves, 10g)
- 1 tablespoon rice vinegar or apple cider vinegar
- 2 to 3 tablespoons water
- 2 teaspoons cornstarch
- 2 teaspoons water
Optional
- 1/4 to 1/2 teaspoon red pepper flakes, optional
- 1/2 teaspoon toasted sesame oil, optional
- Sesame seeds, for garnish (optional)
- Sliced green onions, for garnish (optional)
Instructions
- Preheat the air fryer to 380°F (193°C) for 3 to 5 minutes.
- Pat chicken dry and cut into 1-inch pieces. Toss with salt, pepper, 1 tablespoon cornstarch, and oil until evenly coated.
- Lightly spray the air fryer basket if needed. Arrange chicken in a single layer with small gaps; cook in batches if necessary.
- Air fry at 380°F (193°C) for 8 to 11 minutes, flipping or shaking halfway, until the thickest piece reaches 165°F (74°C) and edges are lightly browned.
- Meanwhile, make the glaze: In a small saucepan combine honey, soy sauce, garlic, vinegar, and 2 tablespoons water; bring to a simmer.
- Whisk 2 teaspoons cornstarch with 2 teaspoons water; stir into the saucepan and simmer until glossy and thick enough to coat a spoon. Add another tablespoon of water if too thick.
- Optional: Stir in red pepper flakes and toasted sesame oil off heat.
- Transfer hot chicken to a clean bowl, pour the glaze over, and toss to coat. Rest 1 to 2 minutes so the sauce clings.
- Optional tacky finish: Return sauced chicken to the air fryer for about 1 minute at 380°F (193°C), watching closely.
- Garnish with sesame seeds and sliced green onions if using.
Tips
- Cut chicken into even 1-inch pieces for consistent cooking.
- Cook in a single layer; crowded pieces steam instead of browning.
- Flip or shake halfway for better browning; rotate trays in oven-style models.
- Add the honey-garlic glaze after air frying to prevent scorching.
- Use an instant-read thermometer and pull at 165°F (74°C).
- Thighs are more forgiving; start checking breasts around 8 minutes.
Variations
- Spicy Honey Garlic: Add 1/4 to 1/2 teaspoon red pepper flakes to the glaze and finish with 1/2 teaspoon toasted sesame oil off heat.
- Gluten-Free: Use tamari instead of soy sauce. If using coconut aminos, slightly reduce the honey to taste.
- Arrowroot Thickener: Substitute arrowroot for cornstarch and avoid boiling the glaze hard after adding it.