
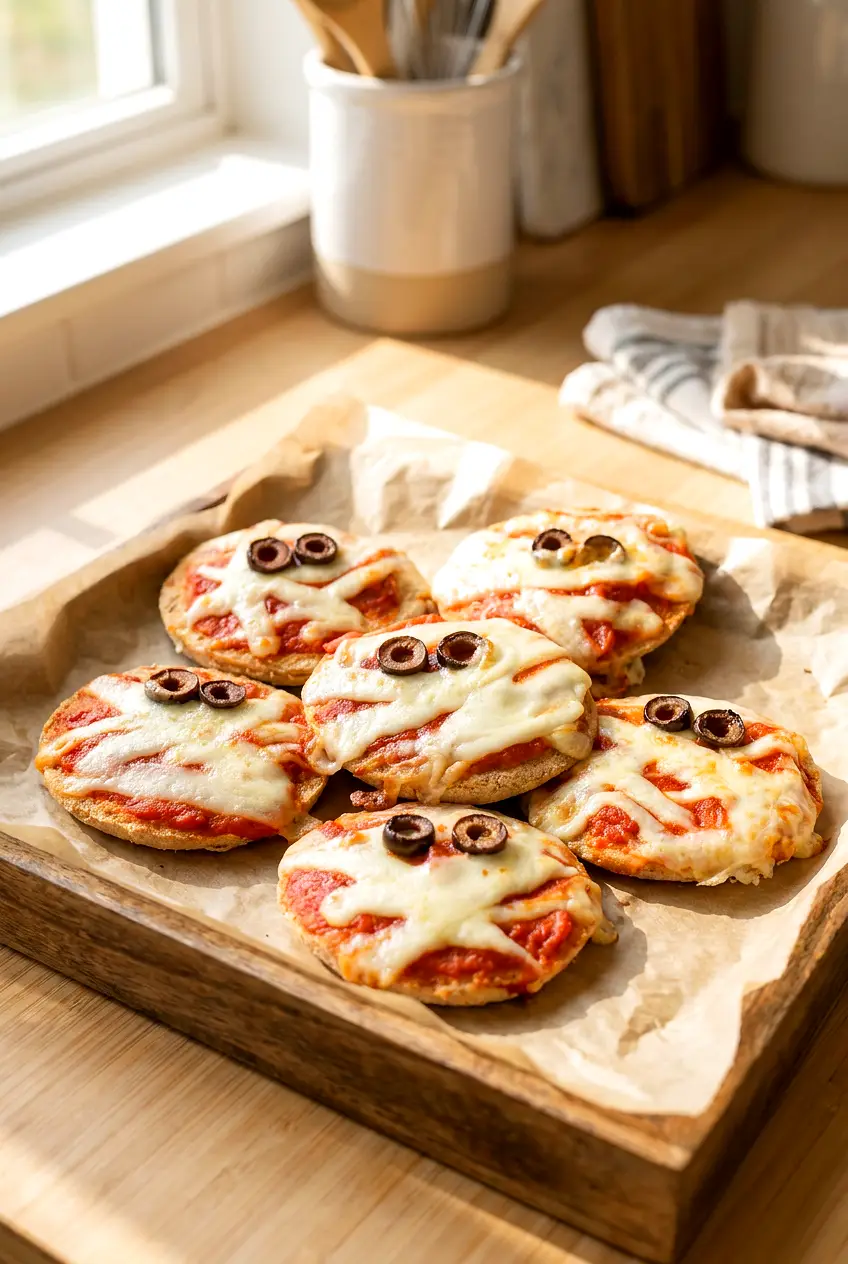
Air Fryer Mummy English Muffin Pizzas
What I like about this air fryer method is that a short pre-crisp on the English muffins makes a real difference. This is one of those recipes where the texture can go wrong fast if the sauce goes onto a soft base, so I rely on that first toast and a thin layer of sauce to keep the muffins from turning soggy.
These mummy English muffin pizzas are an easy Halloween snack, quick lunch, or simple dinner with very little prep. The air fryer toasts the muffin edges, melts the mozzarella fast, and gives you the mummy look without much decorating.
If you want another easy Halloween snack, try these Air Fryer Mummy Dogs too.
Ingredients for Air Fryer Mummy English Muffin Pizzas
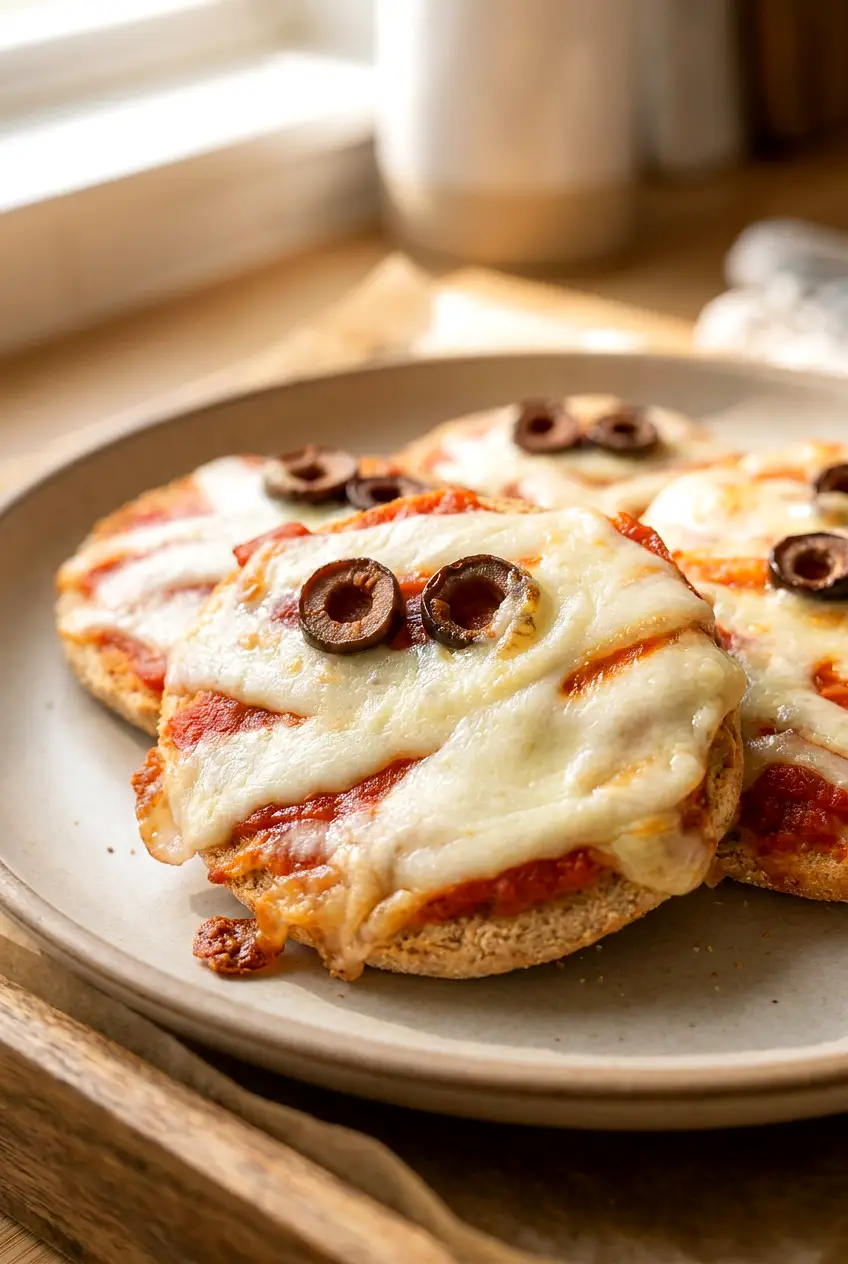
- 3 English muffins, split into 6 halves (about 240g)
- 1/2 cup pizza sauce (120g)
- 1 1/2 cups shredded mozzarella cheese (170g)
- 1/2 cup mini pepperoni (60g)
- 1 teaspoon Italian seasoning
- 1/2 teaspoon garlic powder
- Pinch of salt, optional
Keep the sauce layer light. Too much sauce is the fastest way to soften the muffins before the tops finish cooking.
Shredded mozzarella works well if you lay it on in loose bands. If you want cleaner mummy “bandages,” string cheese cut into thin strips is an easy swap.
Mini pepperoni fits the muffin size best, but use it lightly. Small toppings can shift once the air starts moving, especially in a crowded basket.
How to Make Mummy English Muffin Pizzas in the Air Fryer

- Preheat the air fryer: Preheat to 375°F (190°C) for about 3 minutes so the muffins start crisping right away.
- Prep the muffins: Split the English muffins and arrange them cut-side up. If you want a little extra browning, lightly spray the cut sides with oil, but it is optional.
- Pre-crisp the bases: Place the muffin halves in the air fryer in a single layer with space between them. Air fry at 375°F (190°C) for 2 to 4 minutes, until the cut surfaces look lightly toasted and feel dry on top.
- Add sauce and seasoning: Spread a thin layer of pizza sauce over each half. Sprinkle with the Italian seasoning and garlic powder, and add a small pinch of salt only if needed.
- Build the mummy topping: Add the mozzarella in strip-like bands or a loose crisscross pattern so it looks like mummy wrapping. Leave a few gaps if you want the bandage look to show more clearly. Scatter the mini pepperoni sparingly so the toppings stay in place.
- Air fry the pizzas: Return the topped muffin halves to the air fryer and cook at 375°F (190°C) for 4 to 8 minutes. Start checking early, especially if your air fryer runs hot or your muffins are thin. Rotate the basket or tray halfway through if your model browns unevenly.
- Check for doneness: I usually look for cheese that is fully melted, a few light golden spots on top, and muffin edges that look crisp and toasted. The sauce should be hot, but not bubbling over the sides.
- Cool briefly: Let the pizzas sit for 1 to 2 minutes before serving so the cheese can set a bit and the toppings do not slide off.
Air Fryer Time and Temperature for English Muffin Pizzas
Use 375°F (190°C) for both stages: first to pre-crisp the plain muffin halves, then again to melt the cheese and finish the pizzas.
Total air fryer time is usually 8 to 12 minutes, including both cooks. If you need to work in batches, the overall time will be a little longer.
I rely more on the visual cue than the clock here because air fryer models vary. During the second cook, start checking once the cheese has melted and the muffin edges begin to color.
How to Keep English Muffin Pizzas from Getting Soggy
The part I pay attention to most is moisture control. English muffins hold up well in the air fryer, but only if the sauce and toppings stay fairly light.
- Pre-toast the muffin halves before adding sauce.
- Use only a thin layer of pizza sauce.
- Do not pile on extra cheese.
- If you add vegetables, keep them small and fairly dry.
If the centers still seem soft, the pizzas were likely over-sauced or overloaded. A lighter topping layer gives the air fryer a better chance to crisp the edges before the cheese overbrowns.
Easy Variations for Mummy English Muffin Pizzas
Sausage or Veggie Mummy Pizzas
Swap the mini pepperoni for cooked crumbled sausage, finely chopped bell pepper, or a mix of both. Keep the add-ins small and not too wet so the muffins still crisp in the same short cook window.
Cheese-Forward Mummy Pizzas
For a simpler Halloween version, use mozzarella in thin strips and keep the toppings minimal. The mummy look shows up more clearly this way, but keep the cheese layer light enough to melt cleanly instead of sliding off.
For another Halloween pizza idea, these Air Fryer Pizza Skulls are a fun follow-up. If you want a different pepperoni version, these Air Fryer Pepperoni Pizza Pumpkins are another good option.
How to Store and Reheat Air Fryer Mummy English Muffin Pizzas
Store leftovers in an airtight container in the refrigerator for up to 3 days. The muffins will soften as they sit, especially if the sauce layer was heavy.
To reheat, return the pizzas to the air fryer at a lower temperature until warmed through and crisp again. I would rather reheat them gently than blast them at a high temperature, since the cheese can overbrown before the center is hot.
The air fryer will bring back more crispness than the microwave, but the texture will not be quite the same as when freshly made. If you want to get ahead, prep the ingredients first and assemble just before cooking so the muffins do not absorb the sauce too early.
Nutrition
Approximate nutrition, based on 6 servings total.
- Serving size: 1 English muffin pizza half
- Calories: about 150
- Protein: about 8g
- Fat: about 8g
- Carbohydrates: about 12g
Approximate nutrition per 100g:
- Calories: about 240
- Protein: about 12g
- Fat: about 13g
- Carbohydrates: about 19g
These values are estimates and will vary with the exact English muffins, sauce, cheese, and pepperoni you use.
Air Fryer Mummy English Muffin Pizzas
Equipment
- air fryer
- measuring cups
- measuring spoons
- knife
- cutting board
- spoon
Ingredients
For the pizzas
- 3 English muffins, split into 6 halves (about 240g)
- 1/2 cup pizza sauce (120g)
- 1 1/2 cups shredded mozzarella cheese (170g)
- 1/2 cup mini pepperoni (60g)
- 1 teaspoon Italian seasoning
- 1/2 teaspoon garlic powder
- Pinch of salt (optional)
Instructions
- Preheat the air fryer to 375°F (190°C) for about 3 minutes.
- Split the English muffins and arrange the halves cut-side up; optionally lightly spray the cut sides with oil for extra browning.
- Place the muffin halves in a single layer in the air fryer with space between them and air fry at 375°F (190°C) for 2 to 4 minutes, until the cut surfaces look lightly toasted and feel dry.
- Spread a thin layer of pizza sauce over each pre-crisped half and sprinkle with Italian seasoning, garlic powder, and a small pinch of salt if needed.
- Add the mozzarella in strip-like bands or a loose crisscross pattern to resemble mummy bandages, leaving some gaps; scatter the mini pepperoni sparingly to keep toppings in place.
- Return the topped muffin halves to the air fryer and cook at 375°F (190°C) for 4 to 8 minutes, checking early and rotating the basket or tray halfway through if your air fryer browns unevenly.
- Check that the cheese is fully melted, there are a few light golden spots, and the muffin edges are crisp and toasted.
- Let the pizzas cool for 1 to 2 minutes before serving so the cheese sets and toppings don’t slide off.
Tips
- Pre-toast the muffin halves so the bases stay crisp when sauce and cheese are added.
- Use a thin layer of sauce to prevent soggy centers.
- Keep the cheese and other toppings light so the muffins crisp before the cheese overbrowns.
- If using vegetables, chop them small and dry to avoid adding moisture.
- Start checking early during the second cook—air fryer models vary in heat.
Variations
- Sausage or Veggie Mummy Pizzas: Swap mini pepperoni for cooked crumbled sausage, finely chopped bell pepper, or both; keep add-ins small and not too wet.
- Cheese-Forward Mummy Pizzas: Use mozzarella in thin strips and minimal toppings so the mummy bandage look shows more clearly; keep the cheese layer light.
Recipe Reviews & Comments (1)